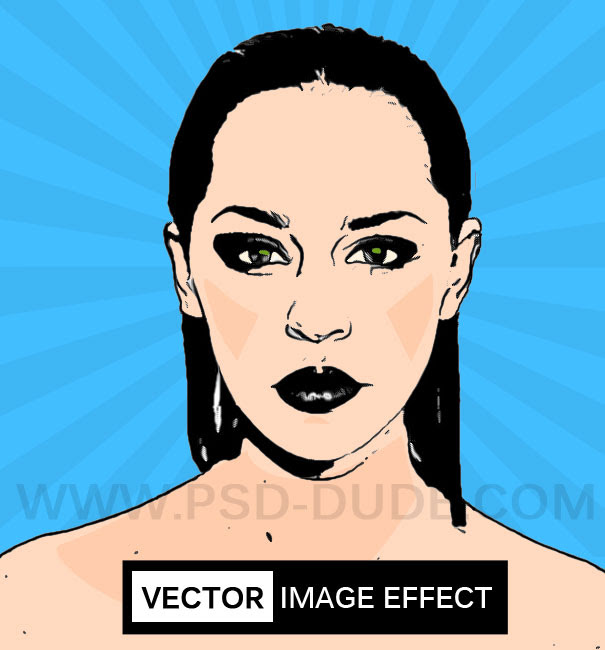
Learn how to create vector photo effect out of any image, clipart, graphics. You can obtain vector ink photo effects in just a few simple steps. I am planning to automate these steps into a Photoshop action that you can easily use and customize. In the meantime you can use Photoshop adjustments and filters like Photocopy and Threshold to create this vector effect.
 In this tutorial I am going to show you a simple way to create a image to vector effect using any photo/image/graphics/etc. In the next tutorial I am going to
show you how simple it is to turn from photo to vector shape in Photoshop. So let's start with this girl stock image; you
can use any image you want but if you want to create vector silhouetts the best are the photos with white/black background. Or better still you can use cutout images.
 Duplicate this layer and call the layers Girl 1 Layer and Girl 2 Layer. You can also keep a copy of the original layer. Go to Image>Adjustments and use the
Threshold adjustment for the Girl 1 Layer. Set the level depending on your photo size, details, etc.
 Set the foreground color black and the background color white. Go to Filter>Sketch and use the
Photocopy filter for the Girl 2 Layer.
 Set the blend mode of the Girl 2 Layer to Multiply and merge the two layers.
 Use again the Threshold adjustment for the new created layer.
 For a smooth edge result you can go to Filter>Stylize and choose Diffuse
 This is how you can convert image to vector effect. You can now use the Paint Brush, color black to close the gaps and to use
the Paint Bucket Tool if you want to add color. I have also added a vector sunburst using these
free sunburst
brushes to create a vector comics background. A similar technique I have used in one of my oldest tutorials on how to create a
comic book effect in Photoshop

No comments:
Post a Comment